
How to Control AI Video Scenes with Kling 4.0 Keyframes
 Jennifer

AI video generators are great at creating impressive visuals, but getting a sequence of events to unfold in the right order can be surprisingly tricky. A single prompt might describe your entire story, yet the final video skips an important action, changes the setting too early, or jumps straight to the ending.
That's where Kling 4.0 multiple keyframes come in.
Instead of relying on text alone, you can provide images of the important moments you want your video to include. These visual references help guide character actions, scene changes, and transitions throughout the generation.
In this guide, we'll explore how to control AI video scenes with Kling 4.0, plan multiple keyframes, and use them for short stories, product advertisements, and creative transformations. We'll also look at what happens when your keyframes don't quite agree with each other.
Because sometimes the problem isn't that the AI lacks imagination. It's that it has a little too much.
What Is Kling 4.0 Multiple Keyframes?
Kling 4.0 is an AI video generation model that supports videos up to 30 seconds long, using text prompts, visual references, and multiple keyframes to guide the result.
Its Multiple Keyframes feature lets you provide up to 10 keyframe images in one video generation, including a first frame, a last frame, and up to eight middle frames.
Each keyframe represents an important visual moment in your video. It could show a character entering a room, a product appearing on a table, a change in camera angle, or the final scene of a short story.
Keyframe example
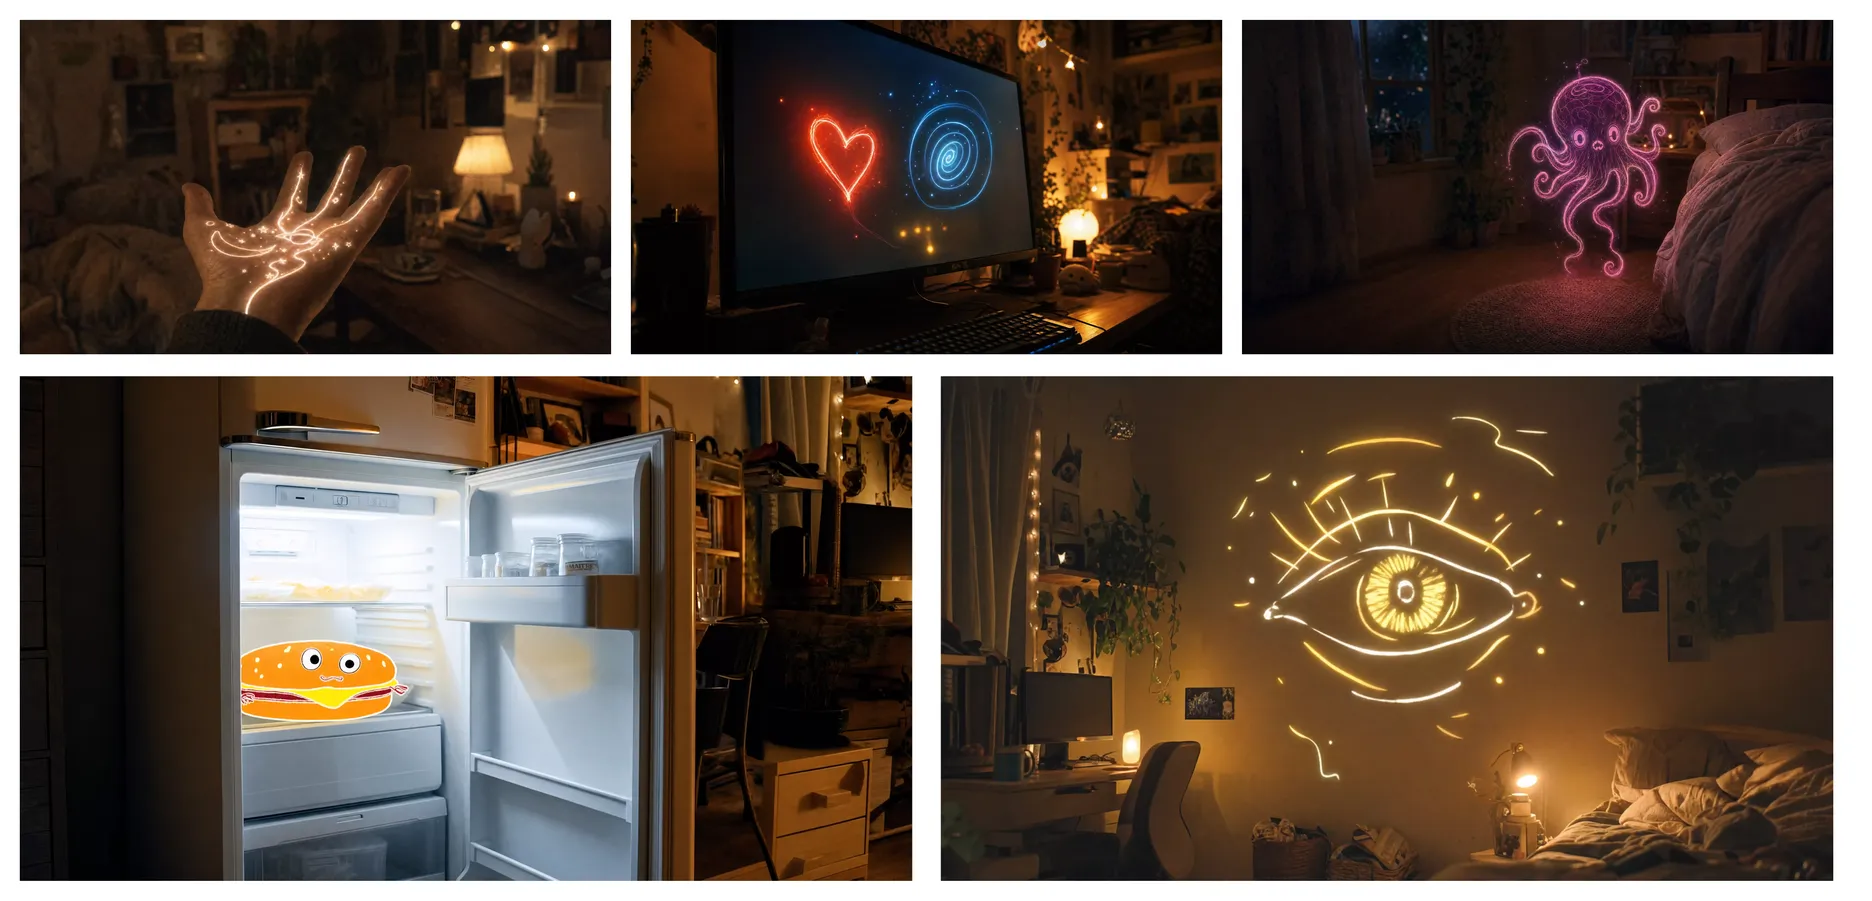
Generated result
Why First and Last Frames Aren't Always Enough
A portrait slowly turning toward the camera may need only two images. The same might apply to a product rotating on a display stand or a landscape gradually becoming brighter.
With only the opening and final images, the model may have difficulty preserving that precise sequence. The jacket might appear too early, the model could skip picking it up, or the change in clothing might happen suddenly.
Adding middle keyframes gives the model a clearer picture of the intended progression.
One frame can establish the model holding the jacket. Another can show the completed outfit. The prompt then describes how the character moves between those moments.
This is particularly useful for short stories, product demonstrations, branded content, and social media videos where a specific visual reveal is central to the idea.
What Multiple Keyframes Can Actually Control
The main advantage of Kling 4.0 keyframes is the ability to specify important visual states rather than leaving the entire sequence to a written description.
You can use them to guide several aspects of a video.
Character actions and positions: Establish where a person begins, how their pose changes, and where they should appear later in the sequence.
Scene progression: Show which environments or important visual events should appear as the video develops.
Composition and camera perspective: Provide visual examples of wide shots, medium shots, and close-ups to guide changes in framing.
Product appearances: Determine when a product should become visible and how its presentation should develop.
Visual transformations: Guide changes in lighting, weather, surroundings, or character appearance.
However, a keyframe is not a guarantee that the model will perfectly reproduce every detail. The final output depends on the compatibility of your images, the prompt, the requested duration, and the model's ability to generate plausible transitions.
The same applies to product packaging, clothing, buildings, and background objects.
A useful way to approach multiple keyframes is to separate what should remain consistent from what should change.
If the person should remain recognizable, preserve their defining features across the images. If the environment is supposed to transform, make that change apparent.
And remember that Kling 4.0 also offers a reference-based video workflow. Visual references can help communicate the appearance of characters or objects, while keyframes define important moments in the video. Choose the workflow according to the creative problem you're trying to solve.
The goal isn't to dictate every second of the animation. It's to give the model a more reliable visual direction.
How to Use Multiple Keyframes in Kling 4.0
Decide what viewers absolutely need to see, prepare the corresponding images, and then write a prompt connecting those moments.
You can follow this workflow using the Kling 4.0 AI video generator on Lipsync.
1. Plan Your Scenes and Prepare Keyframes
Before opening the generator, describe your video idea in one sentence.
For example:
A traveler enters an old train station, discovers a glowing suitcase, and opens it to reveal a miniature galaxy.
Now ask yourself which moments would be difficult for the model to infer from the opening and closing frames alone.
In this example, three events matter: finding the suitcase, opening it, and revealing what's inside.
A practical five-frame plan might look like this:
| Keyframe | Visual moment | Purpose |
|---|---|---|
| First | Traveler enters the station | Establish character and location |
| Middle 1 | Traveler notices the suitcase | Introduce the important object |
| Middle 2 | Traveler kneels beside it | Prepare the interaction |
| Middle 3 | Suitcase begins to open | Establish the turning point |
| Last | A miniature galaxy glows inside | Deliver the final reveal |
This sequence gives the model useful visual information without demanding a new image for every small movement.
The trick is to choose moments that change the viewer's understanding of the scene.
A character taking one more step usually doesn't require another keyframe. A character discovering a mysterious object probably does.
For a short clip, two or three frames may be enough. For a longer sequence with several important changes, adding more middle frames can make sense.
Kling 4.0 supports up to 10 keyframes, but that's a limit, not a target.
It's also worth thinking about the intended video duration before you prepare the images. A story involving six distinct events might feel rushed in eight seconds, even if you've supplied a keyframe for every moment.
The model needs enough time to generate the movement between important states.
If the idea requires too many major changes, simplify the sequence or consider dividing it into separate clips for later editing.
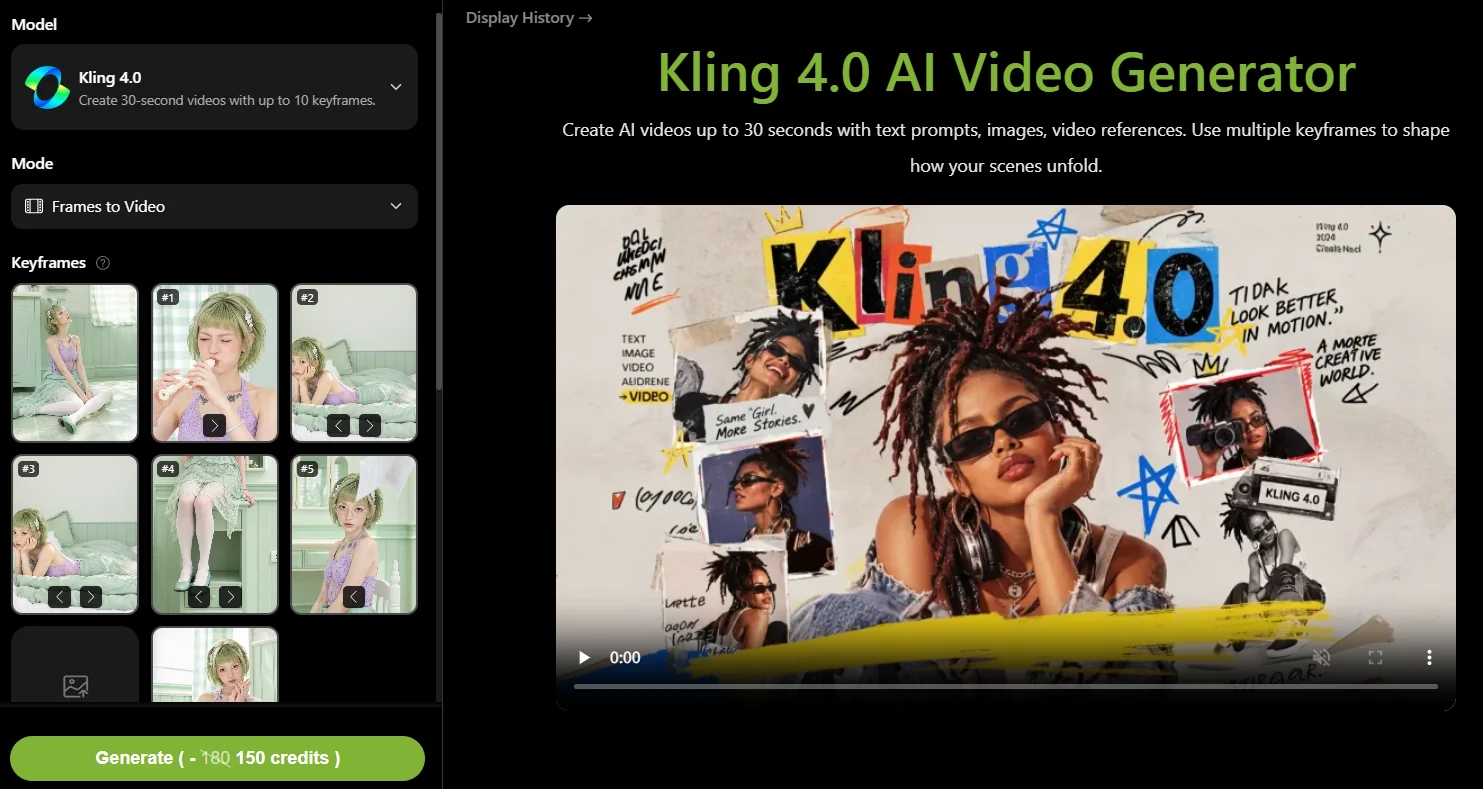
2. Arrange Your First, Middle, and Last Frames
Prepare images for these moments, keeping characters and settings consistent. Need to create or refine your images? Try Seedream 5.5 to prepare visual references for your video.
Add your opening image as the First Frame. This establishes the initial appearance of the scene.
Next, upload the Middle Frames in the order you want the visual changes to happen. Each middle frame should introduce a meaningful development while keeping relevant details consistent.
Finally, add the Last Frame to define the intended ending.
Try to keep the images consistent in aspect ratio and overall visual style. If one image looks like a realistic film still and the next resembles a colorful cartoon, the model has to resolve a much larger visual difference.
Unless that style transformation is intentional, you're making the task harder than necessary.
Pay particular attention to character identity. Similar clothing, hairstyles, facial features, and accessories can help the model maintain continuity.
For a product video, the same principle applies to packaging, logos, colors, and proportions.
You can also use different camera perspectives, but they should serve a purpose. A wide establishing image followed by a closer view of the subject may support a natural progression. Randomly switching perspective in every keyframe can make the sequence harder to interpret.
If a middle frame does not show a new important visual state, consider removing it.
A well-planned four-frame sequence is often more useful than ten images that all communicate slightly different versions of the same thing.
3. Write a Prompt That Connects Your Keyframes
Your images establish the important visual moments. Your prompt explains what happens between them.
For Kling 4.0, a useful prompt describes the sequence of actions, changes in camera perspective, atmosphere, and any relevant sound.
It should complement the keyframes rather than repeat their appearance in exhausting detail.
Here is a separate example prompt for a character-focused keyframe sequence:
Example prompt
Build the sequence around the supplied keyframes, preserving the subject, outfit, and pastel mint-green room. A young woman with short mint green hair, bangs, colorful clips, soft freckles and blush, light eyes, a lavender halter top, sheer light green skirt over white tights, and light green Mary Janes appears in a cinematic sequence. Start with a wide shot of her sitting on the tiled floor, leaning back and looking up pensively. Cut to a close-up as she glances toward an unseen window with a soft smile. Show close-ups of her playing a white recorder, first focused, then relaxed. Follow with a medium shot of her clasping her hands and smiling at camera, then sitting on a mint green cabinet with her legs dangling and gently swinging. Next, show her lying on her stomach on a mint green bed, feet raised and crossed, smiling thoughtfully at camera. End with her standing in clear-framed glasses as white papers flutter around her; one sheet crosses the lens, turning into a circular iris close-up on her face before fading to black.
Notice what this prompt does.
It explains the action between the reference images, establishes the order of events, and identifies what needs to remain consistent.
4. Generate and Check the Scene Progression
After adding your keyframes and prompt, select your video settings.
The Kling 4.0 AI video generator on Lipsync supports videos up to 30 seconds, with 720p and 1080p resolution options. Available aspect ratios include 16:9, 9:16, and 1:1.
Choose the format based on where you intend to publish the video.
For a cinematic landscape sequence, 16:9 may be appropriate. For TikTok, Instagram Reels, or YouTube Shorts, 9:16 is usually a more practical starting point.
Then generate the video and review it as a sequence rather than simply judging whether individual frames look attractive.
Six keyframes in sequence
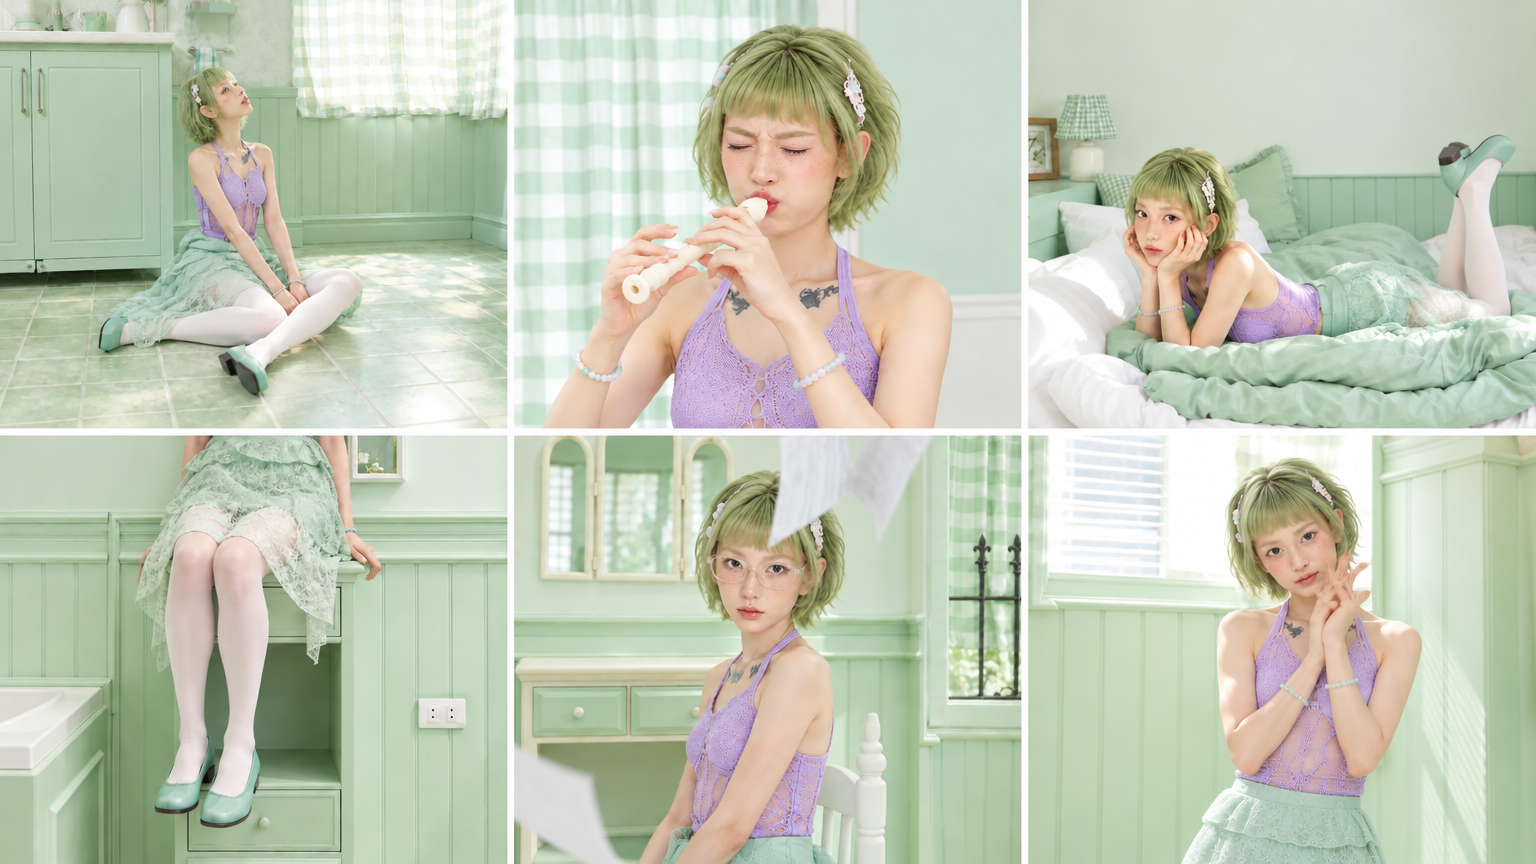
Generated result
3 Ways to Control AI Video Scenes with Kling 4.0
Not every video needs the same kind of control. A commercial depends on timing, a short film needs a clear sequence of events, and a visual transformation should feel continuous rather than abrupt.
With Kling 4.0 multiple keyframes, you can guide these different creative needs by defining the important visual moments instead of leaving everything to a single prompt.
1. Build a Product Ad Around Clear Visual Beats
A good product ad does more than show an attractive product. It builds anticipation, demonstrates value, and leaves viewers with a memorable final image. Getting those moments in the right order is essential.
With Kling 4.0, marketers can structure an ad around a clear progression: establish the setting, introduce the product, demonstrate its features, show it in use, and finish with a hero shot.
For example, a sports drink commercial might begin with an athlete preparing for a workout, introduce the bottle during a break, move into a refreshing close-up, and end with the product against a clean background.
Multiple keyframes help establish when each important moment should appear. You can also guide changes in composition, from an energetic lifestyle scene to a detailed product shot.
This approach is useful for product launches, social media campaigns, and branded videos where the order of the visuals matters just as much as their appearance.
2. Control Story Progression in a Short Narrative
AI can generate a convincing opening and an impressive ending, then somehow forget the events that were supposed to happen between them.
That's especially frustrating when you're creating a short film, music video, or character-driven story.
Kling 4.0 keyframes allow you to establish the turning points of a narrative, such as a character discovering something, reacting to an event, changing direction, or reaching a new location.
Imagine a detective following a stranger through a crowded city. The stranger disappears into an alley, the detective discovers a hidden entrance, and the story ends inside an abandoned underground station.
Rather than relying entirely on a lengthy prompt, multiple keyframes can define these important moments. The prompt then describes how the character moves and reacts between them.
This helps give the story a clearer progression, especially when several actions must happen in a particular order. It won't guarantee perfect storytelling, but it gives the model fewer opportunities to skip the interesting part.
3. Direct Character, Scene, or Style Changes
Not every creative video needs a complicated plot. Sometimes the transformation itself is the main attraction.
A character changes from casual clothing into an elaborate costume. A city street gradually moves from daylight into a neon-lit night. A realistic portrait slowly takes on the appearance of a hand-drawn illustration.
With Kling 4.0 multiple keyframes, you can define the visual states of these changes and guide how one appearance develops into another.
For a fashion transformation, reference images can show the outfit at different stages while preserving the model's identity. For an environmental transition, keyframes can introduce changes in lighting, weather, and atmosphere while keeping the location recognizable.
The important distinction is continuity. Rather than treating the transformation as two unrelated images, multiple keyframes provide visual guidance for the stages in between.
This makes them useful for fashion edits, creative transitions, music visuals, and experimental content where the visual change matters more than the story behind it.
FAQs About Kling 4.0 Keyframes
1. How Many Keyframes Can I Use in Kling 4.0?
Kling 4.0 supports up to 10 keyframes, including a First Frame, a Last Frame, and up to eight Middle Frames.
Each frame should represent an important visual moment. You don't need to use all ten, especially for simple videos with only a few scene changes.
2. Do I Need All 10 Keyframes for a 30-Second Video?
No. More keyframes don't automatically mean better results.
For a simple transformation, three or four frames may be enough. Videos involving several character actions or scene changes may benefit from additional frames.
Start with the essential moments and add more only when they help clarify the sequence.
3. Can I Control AI Video Scenes Without a Detailed Prompt?
Yes, but a short, clear prompt still helps.
Multiple keyframes show the visual states you want to include, while the prompt explains how the action moves between them. Describe important movements, camera changes, and details that should stay consistent.
You don't need a miniature screenplay. A few well-written sentences can be enough to guide Kling 4.0.
4. What's the Difference Between Kling 4.0 Keyframes and Multi-Shot?
They're different approaches to AI video creation.
Kling 4.0 Multiple Keyframes let you upload images representing important moments in a video. The model generates the movement and transitions between those visual references.
Multi-Shot, available through the Kling 3.0 workflow on Lipsync, lets you plan separate shots with individual prompts and durations.
In short, keyframes guide important visual changes, while Multi-Shot organizes separate shots. They shouldn't be treated as the same feature.
Make Your Next AI Video with Kling 4.0
AI can generate impressive scenes, but getting them to unfold in the right order is another challenge.
With Kling 4.0 multiple keyframes, you can plan the important visual moments before generation, whether you're telling a short story, introducing a product, or transforming a familiar setting.
You don't need ten frames or a complicated prompt to get started. Choose a few meaningful images, connect them with clear instructions, and see how the story develops.
Try your own sequence with Kling 4.0 on Lipsync. A little planning can go a long way toward making an AI video feel like the one you actually imagined.