
How to Create Picture in Picture YouTube Videos with AI
 Jennifer
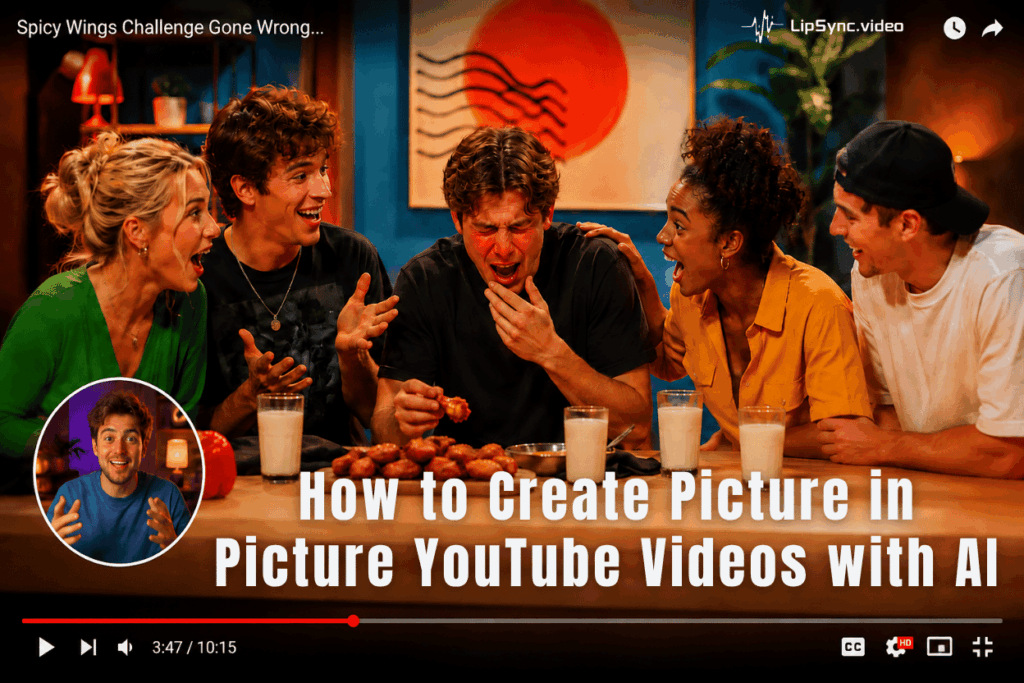
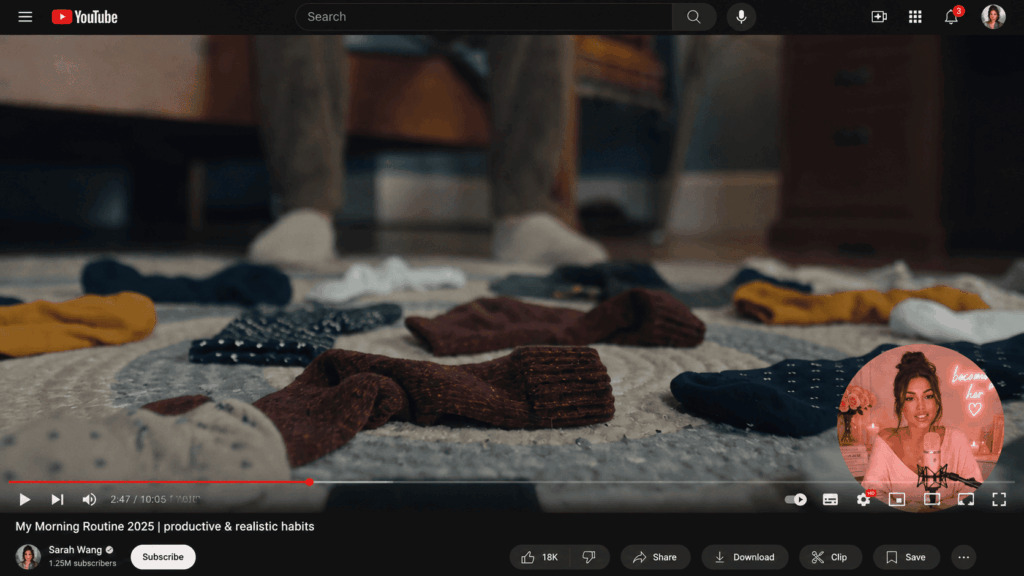
You have probably seen this format on YouTube: the main video fills the screen while a creator appears in a small circle or corner window, speaking directly to the audience.
It looks simple, but the traditional workflow is more involved than it seems. You have to record yourself, capture clean audio, layer the camera footage over the main video, resize it, position it, and make sure it does not cover anything important.
That is where AI changes the workflow.
In this guide, we’ll explore how picture-in picture youtube works for creators, why this format is useful, and how to create one with AI. We’ll also walk through the workflow on Lipsync video, from creating an AI talking photo to choosing the presenter’s shape and position.
What Is Picture in Picture YouTube?
1. YouTube Picture in Picture for Watching Videos
The phrase “picture in picture” can be confusing because viewers and creators often use it to mean two different things.
For viewers, YouTube picture in picture usually means a playback feature: the video continues playing in a smaller floating window while the viewer browses elsewhere on a compatible device.
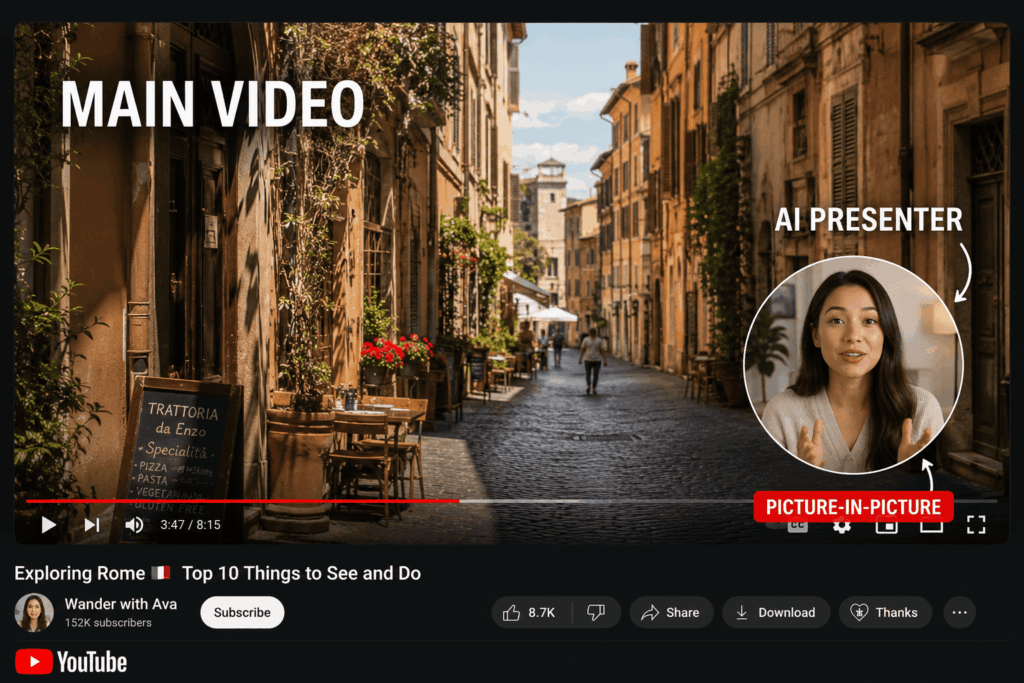
For creators, however, picture in picture refers to a video layout: a smaller visual element sits on top of the main content.
That second meaning is what matters for creators who want to make picture in picture YouTube videos.
2. Picture in Picture for Creating YouTube Videos
A picture in picture youtube video usually contains two visual layers.
The first is the main content. This can be a screen recording, an existing video, gameplay footage, a presentation, or another visual that needs most of the viewer’s attention.
The second is a smaller presenter layer. Traditionally, this might be a webcam recording; with AI, it can be generated from a portrait or character.
This is where picture in picture youtube becomes useful for creators. Instead of filming yourself for every video, you can create an AI presenter, prepare the speech, and place the presenter over your main content.
A circular presenter in the bottom-right corner is one familiar example. A rounded rectangle, square, or another supported shape can work just as well, depending on the style of the channel.
The goal is not to make the presenter compete with the main video. It is to make both elements work together.
Once you see picture in picture youtube this way, it becomes much easier to understand why an AI talking head fits the format so naturally.
How to Create a Picture in Picture YouTube Video with AI
Creating a picture in picture YouTube video can be much simpler than building one from scratch in a traditional video editor. With AI talking photo generator, you can create the talking head first, add the video you want to use as the main background, and then customize how the presenter appears on screen.
The entire process takes three steps.
Step 1. Create Your Talking Head
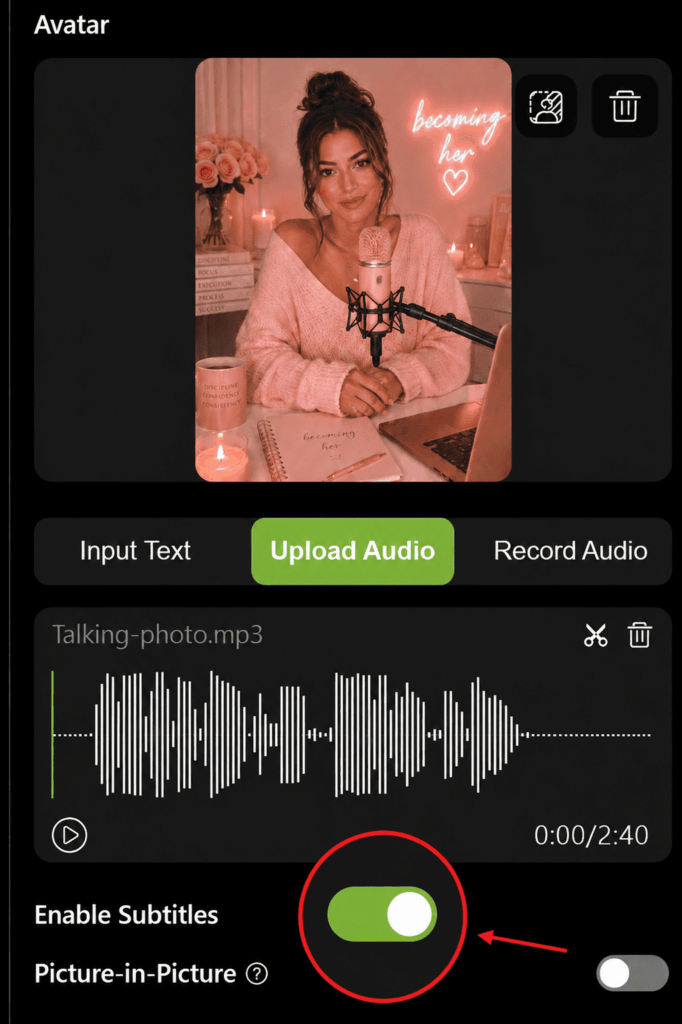
Start by creating the person who will appear in your YouTube video. With the AI Talking Photo Generator, you can upload a portrait, choose an available character, or design an AI character that fits your content style.
When creating a presenter for a picture in picture youtube video, choose a character that remains recognizable at a smaller size. Clear facial features and simple backgrounds usually work better because the presenter will occupy only a small area of the screen.
Once you have your character, add the voice they will use. You can enter a script to generate speech, upload an existing audio file, or record your voice directly. This gives you more flexibility depending on how you create content. A creator can quickly turn a written script into narration, while a marketing team can use an approved voiceover without recording the presenter again.
Step 2. Turn On Picture in Picture and Add Your Background Video
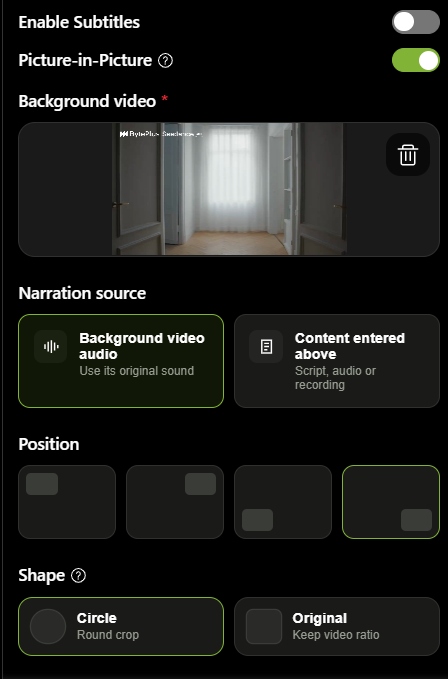
With your talking head ready, open the Picture in Picture feature and upload the video you want to use as the background.
Your background video can be a screen recording, existing footage, gameplay, presentation recording, or another video that provides the main visual information. The talking head acts as the presenter, while the background remains the focus of the video.
This setup keeps both elements visible at once. In a picture in picture youtube video, the presenter can explain the content while viewers continue watching the main footage.
At this stage, think of the composition simply as:
Background video = main contentTalking head = presenter
Lipsync combines these two elements into a picture in picture layout, so you can create the basic composition without manually building multiple video layers from scratch.
Step 3. Choose the Talking Head Shape and Position
Once the background video is in place, customize how your talking head appears on screen. Choose the "shape" that best fits your content. A circular presenter is a natural choice for many YouTube videos and creates a familiar webcam-style look while remaining visually separate from the rectangular background.
Next, choose the position of the presenter. You can place it in the top-left, top-right, bottom-left, or bottom-right corner, depending on where it fits best within your video.
The best position depends on the background. If the video contains subtitles near the bottom, move the presenter to the top corner. If the main action happens near the top, a lower corner may work better. The goal is not to find a universal “best” position, but to keep the speaker visible without competing with the main content.
Once the shape and position are set, generate the final video. You now have a complete picture in picture YouTube video with your main footage and AI presenter working together.
Tips for Creating Better Picture in Picture YouTube Videos
Making a picture in picture video is easy enough; making the two layers feel intentional is the harder part.
A good picture in picture YouTube video should not look as though a webcam window was dropped on top of the video at the last minute.
The presenter should feel like part of the composition.
1. Keep the Presenter Small but Visible
The presenter needs enough space to remain recognizable, but not so much space that the audience forgets what the video is actually about.
This balance matters even more when using a circular AI presenter.
At a large size, the presenter can become the dominant element. At an extremely small size, facial expressions and lip movement become difficult to notice.
Start small, then increase the size only if necessary.
Ask yourself:
Can I recognize who is speaking without losing sight of the main content?
If the answer is yes, the size is probably working.
A useful rule is to check your video at the size your audience will actually see it. A presenter that looks perfect in the editor may become too small once the full video is playing on a laptop or phone.
2. Choose a Position That Doesn't Block Key Content
Position should be based on the background video, not habit.
Many creators automatically choose the bottom-right corner because it feels familiar. That can work, but it can also cover subtitles, buttons, charts, or other useful information.
Before generating the final video, look for parts of the frame with little or no important information.
A screen recording might have important controls along the bottom. A presentation might place slide numbers or notes in a corner. A gameplay video may have a scoreboard or map that cannot be coverenaturald.
Move your AI presenter to the least important visual area.
Keep the presenter in the least important area of the frame, and let the main footage carry the story.
3. Match Your Presenter to Your Video Style
Consistency can also help viewers recognize your content more quickly. Using the same presenter shape, position, and visual style across multiple picture in picture youtube videos creates a familiar viewing experience.
For example, a professional YouTube channel may use a realistic presenter with a clean circular frame. A gaming channel may use a more expressive character. A casual educational channel may prefer a friendly portrait with a softer visual treatment.
You can also keep the same presenter across a series of videos.
That consistency is useful for audience recognition. When viewers see the same presenter return, they do not need to figure out who is speaking each time.
This becomes especially useful when creating content at scale.
Instead of producing every talking head video from scratch, you can treat the presenter as part of your channel identity.
4. Keep the Script Conversational
A presenter can look natural and still feel awkward if the script sounds like product documentation.
Write for the ear, not the screen.
Shorter sentences usually work better. Use transitions that sound natural. Avoid stacking too many technical terms into one line.
Instead of:
“The following interface configuration allows users to subsequently initiate the relevant operation.”
Say:
“Now, let’s open the settings and start the next step.”
The second sentence sounds like a person speaking.
This matters for AI presenter content because the visual character is only half of the experience.
The more conversational the script, the more naturally your AI presenter fits into the video.
AI Picture in Picture vs. Traditional Video Editing
Creating a picture in picture youtube video traditionally means combining multiple video layers in an editor. You record the presenter, import the main footage, resize and position the presenter, and then export the final video.
AI does not make traditional editing unnecessary. It simply moves more of the work into the generation process: you prepare the presenter and voice, add the background video, choose the layout, and generate the result.
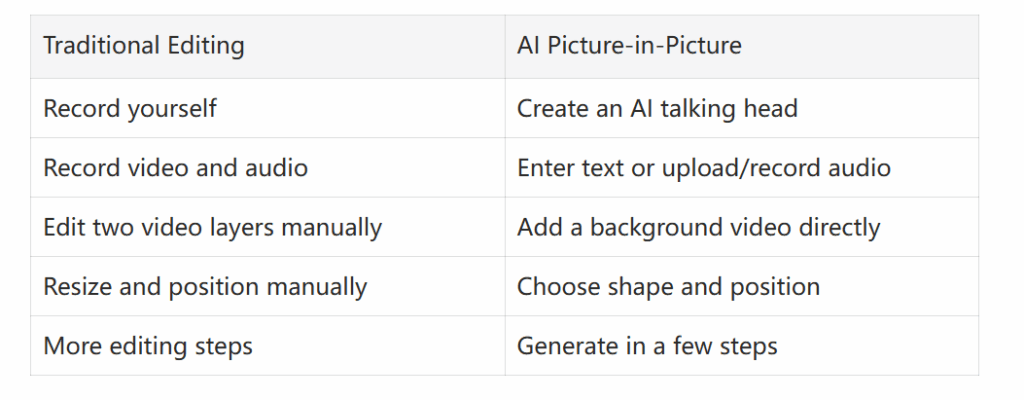
The main advantage is flexibility. If your script changes, you can update it without setting up another recording session. You can also switch the background video or adjust the presenter’s shape and position without rebuilding the entire video.
Lipsync’s AI Talking Photo Generator lets you prepare the presenter from a portrait or character, add text or audio, and then combine it with your background video in the picture in picture youtube workflow before generating the final result.
It is not about replacing traditional video editors. For occasional projects, traditional editing may be perfectly fine. The difference becomes more noticeable when you need to produce this format repeatedly. An AI picture in picture youtube workflow lets you reuse the presenter setup, change the script, swap the background, and adjust the layout without rebuilding the entire video from the beginning.
Conclusion: Create Picture in Picture YouTube Videos Without the Camera Setup
Creating a picture in picture YouTube video does not have to mean setting up a camera, recording another take, and manually arranging multiple layers. With AI, you can prepare the presenter, add your main footage, choose the layout, and generate the final result in one workflow.
Whether you are adding commentary, explaining a screen recording, or keeping a presenter visible throughout a video, picture in picture youtube gives you a simple way to show the speaker and the content at the same time.
With Lipsync’s AI Talking Photo Generator, you can create the presenter without another camera session and customize its shape and position before generating the final video.